Auto Paint Protection Film is a great investment to preserve the exterior aesthetics and integrity of your car. This durable, clear film provides protection against UV damage, scratches, chips and stains. It can be tedious to apply PPF, but you can get professional results with the right tools. This blog will walk you through the process of applying auto paint protection film.
Materials and Tools Needed
Gather the following materials and tools before you start:
- Paint Protection Film Kit
- Spray bottle with slip solution (water mixed with a few drops baby shampoo).
- Spray bottle filled with tack solution.
- Squeegee
- Microfiber cloths
- Heat Gun or Hairdryer
- Utility knife or precision Cutting Tool
- Cloths that are lint free and clean
Step-by-Step Guide
- Preparation
- Cleaning the Surface: Wash and dry your vehicle thoroughly to remove dirt, dust or debris. If necessary, use a clay bar to remove embedded contaminants.
- Working in a Controlled Environment: Install the film in a dust-free, clean environment. Avoid windy and direct sunlight to avoid contaminants adhering to your film or vehicle.
- Measure and cut the film
- Template Kit or Pre-Cut kit: If you already have a PPF pre-cut kit, then skip this step. Use a template to measure and cut the film according to the area you wish to cover.
- Apply Slip Solution
- Spray the Slip Solution on the Vehicle Surface: Generously squirt the slip solution over the surface of the vehicle where the film is to be applied. You can then position the film precisely without having to worry about it sticking right away.
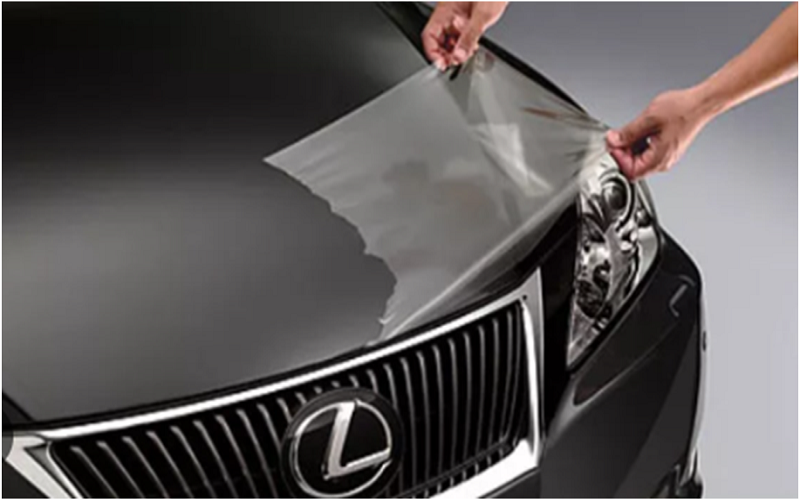
- Position the film
- Place the film: Peel the backing off the film, and place it on the surface that is wet. The slip solution can be used to align the film with the edges and contours on the vehicle.
- Activate the Adhesive
- Spray the Tack Solution: After the film has been positioned correctly, spray the Tack solution around the edges of the film and the areas you want it to adhere. This will help the adhesive to bond quickly.
- Squeegee out the solution
- Start at the Center: Start from the middle of the film, and move outwards, pushing air bubbles and slip solution towards the edges. Apply even, firm pressure to achieve a smooth finish.
- Work In Sections: Divide your area into manageable segments, spraying the tack as necessary and using the squeegee for film adhesion.
- Heat and Stretch
- Use a hairdryer or heat gun to gently warm up the film for curved or complex surfaces. It will become more flexible and stretchable, and it will conform better to the contours of your vehicle. Overheating can damage the film.
- Stretch & Smooth: Gently stretching the film, use a squeegee and smooth over the curves.
- Trim Excess Film
- Precision cutting: Trim any excess film around the edges with a utility blade or precision cutter. Avoid cutting into the paint of your vehicle.
- Final Inspection
- Check for Air Bubbles: Inspect your film for any air bubbles that may still be present. Remove small bubbles with the heat gun and squeegee. If necessary, lift sections and reapply them.
- Allow the Film to Cure. Let the film cure at least for 24 hours. Avoid washing the vehicle or exposing it to extreme weather conditions.
Maintenance Tip
- Avoid harsh chemicals when washing your car to prevent damaging the PPF film.
- Regular cleaning: Maintain the film’s clarity and effectiveness by keeping it clean. Use a microfiber rag and cleaning solutions.
- Inspect Regularly: Check the film periodically for signs of lifting and damage. Address any problems immediately to maintain protection.
Conclusion
The results of applying auto paint protection films are well worth the effort. Follow these steps to protect the paint of your car from damage. Consider hiring a professional to install the PPF if you are unsure of the process or desire a flawless result. PPF applied correctly enhances the appearance of your vehicle and helps to preserve its value. It is a worthwhile investment.
This post was written by a professional at M Tint. https://m-tint.com/ is your ultimate destination for professional window tinting services in N. Hollywood, CA. With over 20 years of unparalleled expertise in the industry, we have established ourselves as the go-to specialists for all your window tinting needs. At the heart of our company is Marcos, our esteemed owner, who has dedicated his career to mastering the art and science of window tinting. Under his leadership, M Tint has grown into a reputable and trusted name, synonymous with quality, precision, and customer satisfaction.